Welcome to the Honeywell T5 Installation Manual, your comprehensive guide to setting up and operating the Honeywell T5 Smart Thermostat. This manual provides step-by-step instructions, ensuring a smooth and proper installation process. Designed for homeowners and technicians, it covers compatibility checks, wiring, and smart features to optimize energy efficiency and comfort.
Overview of the Honeywell T5 Smart Thermostat
The Honeywell T5 Smart Thermostat is a cutting-edge, Wi-Fi-enabled device designed to enhance home comfort and energy efficiency. With its sleek, modern design, it offers seamless smart home integration, allowing users to control temperature settings remotely via the Honeywell Home app. Compatible with various HVAC systems, the T5 thermostat supports geofencing and smart recovery features, ensuring optimal performance and energy savings. Its intuitive interface and advanced scheduling capabilities make it a versatile solution for homeowners seeking convenience and efficiency in temperature management.
Importance of Proper Installation
Proper installation of the Honeywell T5 Smart Thermostat is crucial for ensuring safety, efficiency, and optimal performance. Incorrect installation can lead to electrical hazards, system malfunctions, or reduced energy efficiency. A well-executed setup guarantees seamless integration with your HVAC system, providing accurate temperature control and smart features functionality. Additionally, proper installation preserves the warranty and ensures compliance with safety standards, safeguarding your investment and home comfort.
Tools and Materials Needed for Installation
Essential tools include a screwdriver, pliers, and voltage tester. Materials needed are wires, wall anchors, and a level for accurate installation of the Honeywell T5.
Essential Tools
To install the Honeywell T5 Smart Thermostat, you’ll need a few essential tools. Start with a screwdriver for removing the old thermostat and mounting the new base. Pliers may be necessary for wire handling. A voltage tester ensures safety by verifying power is off. Additionally, a level will help align the thermostat base properly on the wall. These tools are crucial for a smooth and professional installation, ensuring the thermostat is securely and accurately mounted.
Additional Materials
Beyond essential tools, gather additional materials to ensure a seamless installation. These include wall anchors for mounting the thermostat base, extra wire nuts for secure connections, and a paint pen for marking wire labels. A drill may be needed for pilot holes in drywall. Lastly, have a ladder or step stool on hand for reaching the installation area. These materials will help you complete the setup efficiently and effectively, ensuring the Honeywell T5 operates correctly in your home.
Compatibility and System Requirements
The Honeywell T5 is compatible with most HVAC systems, including gas, oil, and electric configurations. It supports conventional and heat pump systems, ensuring wide compatibility. Always verify system requirements before installation to guarantee proper functionality.
Checking System Compatibility
Before installation, ensure the Honeywell T5 is compatible with your HVAC system. Verify voltage requirements and wiring configuration. The thermostat supports most systems, including gas, oil, electric, and heat pumps. Check for compatibility with multi-stage systems, humidifiers, and dehumidifiers. Refer to the manual for specific system types and voltage ratings. Proper compatibility ensures optimal performance and avoids installation issues. Always turn off power to the HVAC system before inspecting wiring or components. This step is crucial for a safe and successful installation.
Understanding HVAC System Types
Understanding your HVAC system type is crucial for proper installation. The Honeywell T5 supports various systems, including gas, oil, electric, and heat pumps. It also works with multi-stage systems, humidifiers, and dehumidifiers. Familiarize yourself with your system’s voltage, wiring, and components to ensure compatibility. Whether you have a single-stage or multi-stage setup, the T5 adapts to your system’s needs, providing efficient temperature control. This understanding ensures a seamless integration of the thermostat with your existing HVAC setup for optimal performance and energy efficiency.
Pre-Installation Steps
Before installing your Honeywell T5 thermostat, ensure your HVAC system is compatible and gather all necessary tools. Verify system type and voltage to avoid installation issues.
Turning Off Power to Your HVAC System
Before starting the installation, ensure your HVAC system is powered off. Locate the circuit breaker or switch controlling your system and turn it off. Verify the system is completely powered down to avoid any accidental start-ups. This step is crucial for safety and prevents potential damage to your equipment. Once the power is off, you can safely proceed with removing the old thermostat and installing the Honeywell T5. Always refer to your HVAC system manual for specific shutdown instructions.
Removing the Old Thermostat Safely
Begin by ensuring the power to your HVAC system is turned off at the circuit breaker. Next, carefully disconnect the wires from the old thermostat, taking note of their colors and connections for reference. Gently pull the thermostat away from the wall, avoiding any force that could damage the wiring or mounting bracket. Once removed, handle the old thermostat with care to prevent accidental activation or damage. Properly dispose of the old unit, ensuring no sensitive components are exposed. This step ensures a clean and safe transition to installing the Honeywell T5.

Installing the Honeywell T5 Thermostat
Mounting the base, connecting wires, and finalizing the setup are key steps in installing the Honeywell T5 Thermostat. Ensure proper alignment and secure connections for optimal performance and energy efficiency. This process sets the foundation for smart temperature control and seamless integration with the Honeywell Home app, enhancing your home’s comfort and energy management.
Mounting the Thermostat Base
Mounting the Honeywell T5 thermostat base is a crucial first step. Begin by turning off power to your HVAC system for safety. Remove any existing thermostat and take note of the wires. Use the provided wall anchors to secure the base plate to the wall, ensuring it is level for proper installation. Align the base with the markings from your old thermostat if available. Gently snap the thermostat onto the base, ensuring it clicks securely into place. This step ensures a stable foundation for your smart thermostat.
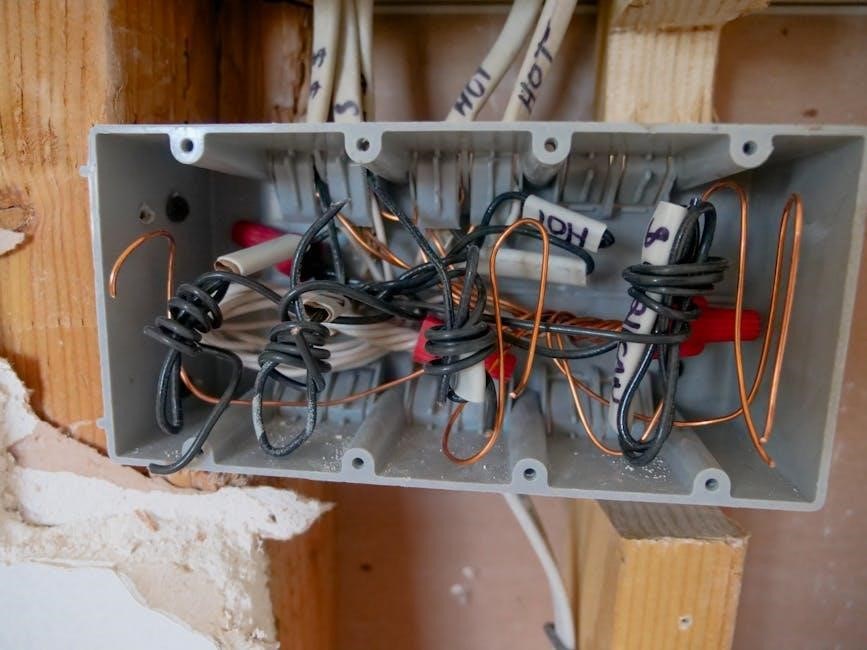
Connecting the Wires Properly
Connecting the wires is a critical step in the Honeywell T5 installation. Ensure the power to your HVAC system is off. Identify the wires from your old thermostat and match them to the corresponding terminals on the T5 base. Use the provided wire labels for clarity. Gently insert each wire into the correct terminal, ensuring they are secure. If your system requires a C-wire, connect it to the C-terminal on the base. If no C-wire is present, use the included power bridge to provide constant power. Double-check all connections before proceeding.
Finalizing the Installation
Once the wires are connected, restore power to your HVAC system. Turn the thermostat on and test heating, cooling, and fan functions to ensure proper operation. Use the Honeywell Home app to complete the setup, syncing your thermostat for smart features. Double-check all connections for security and accuracy. If everything functions correctly, your Honeywell T5 is installed successfully. Refer to the app or manual for additional settings like scheduling or geofencing to enhance energy efficiency and comfort.

Setting Up the Honeywell Home App
Download and install the Honeywell Home App from the app store. Create an account or log in if you already have one. Open the app and navigate to the section for adding a new device. Select the Honeywell T5 Smart Thermostat from the list of available devices. Follow the in-app instructions to connect your thermostat to your home Wi-Fi network by entering your Wi-Fi password. Ensure your thermostat is in pairing mode, typically found in the settings menu. Once connected, you can control your thermostat remotely, set schedules, and access smart features like geofencing and smart recovery for enhanced energy efficiency and comfort. The app will guide you through any additional setup steps to optimize your thermostat’s performance.
Downloading and Installing the App
Visit the app store on your smartphone or tablet. Search for the Honeywell Home App. Select the app from the search results to begin downloading. Once downloaded, tap “Install” to complete the installation process. Open the app and create a Honeywell Home account or log in if you already have one. The app will guide you through the setup process, including connecting your thermostat to your home Wi-Fi network and pairing it with the Honeywell T5 Smart Thermostat to ensure seamless control and smart features.
Pairing the Thermostat with the App
Open the Honeywell Home App and log in to your account. Ensure your thermostat is powered on and in pairing mode. The app will automatically detect the thermostat. Once detected, tap “Set Up Now” to begin pairing. Follow the in-app instructions to connect your thermostat to your Wi-Fi network. After successful pairing, you can control your thermostat remotely, access smart features, and receive notifications for optimal performance and energy savings. Ensure a stable internet connection for seamless pairing and operation.
Navigating the App Interface
The Honeywell Home App features an intuitive interface designed for easy navigation. Upon opening, the home screen displays your thermostat’s current temperature, humidity, and system status. Tap the menu icon to access settings, scheduling, and smart features. Use the navigation bar to switch between home, schedule, energy, and device settings. Adjust temperature, enable geofencing, or view energy usage directly from the app. The interface is user-friendly, allowing seamless control and customization of your Honeywell T5 thermostat for optimal comfort and energy efficiency.
Programming the Honeywell T5 Thermostat
Program your Honeywell T5 with a step-by-step guide for scheduling, smart features, and geofencing to optimize comfort and energy efficiency.
Setting Up a Daily Schedule
Setting up a daily schedule on your Honeywell T5 thermostat is straightforward. Open the Honeywell Home app, navigate to the scheduling section, and create a custom plan. Set specific temperatures for different times of the day, such as waking up, leaving home, or sleeping. You can customize settings for each day of the week to match your routine. Save your preferences to ensure consistent comfort and energy efficiency. This feature helps you maintain ideal temperatures while reducing energy consumption when you’re away.
Understanding Smart Features
The Honeywell T5 thermostat offers advanced smart features that enhance comfort and efficiency. Geofencing uses your location to adjust temperatures, while Smart Recovery learns your system’s behavior to reach desired temperatures efficiently. Energy reports provide insights into your usage, helping you optimize savings. These features integrate seamlessly with the Honeywell Home app, allowing remote control and customization. By leveraging these technologies, you can enjoy a smarter, more energy-efficient home environment tailored to your lifestyle and preferences.
Geofencing and Smart Recovery
The Honeywell T5 thermostat features geofencing, which uses your smartphone’s location to automatically adjust temperatures when you leave or arrive home. Smart Recovery learns your HVAC system’s behavior to reach desired temperatures efficiently, reducing energy waste. These features work together to optimize comfort and energy savings, ensuring your home is always at the right temperature without unnecessary heating or cooling. By adapting to your schedule and system performance, the T5 enhances your home’s energy efficiency and overall comfort seamlessly.
Troubleshooting Common Issues
This section helps identify and resolve common problems with the Honeywell T5 thermostat, ensuring smooth operation and optimal performance. Address issues swiftly with clear, guided solutions.
Resolving Connectivity Problems
Connectivity issues with the Honeywell T5 thermostat can often be resolved by checking your Wi-Fi network stability. Ensure the thermostat is connected to the correct network and that your router is functioning properly. Restarting the thermostat and router can also resolve temporary glitches. If issues persist, verify that the Honeywell Home app is up to date and that your smartphone or tablet is connected to the same network. For manual setup, refer to the app’s guided instructions to pair the thermostat correctly.
Addressing Heating or Cooling Issues
If your Honeywell T5 thermostat isn’t controlling your HVAC system properly, ensure the temperature settings are correct and the schedule is configured accurately. Check for loose wire connections or incorrect wiring, as this can prevent the system from heating or cooling. Restart the thermostat and HVAC system to reset the connection. If the issue persists, verify that the thermostat is compatible with your HVAC system type. Consult a professional if the problem remains unresolved to avoid further complications.
Factory Resetting the Thermostat
To factory reset your Honeywell T5 thermostat, navigate to the menu, select Factory Reset, and confirm the action. This will restore default settings, erasing all custom configurations. Ensure the thermostat is powered on and connected to your HVAC system before resetting. After the reset, the thermostat will restart, and you’ll need to set up preferences and reconnect to the Honeywell Home app. This process is useful for resolving persistent issues or preparing the device for transfer to a new user.
Maintenance and Care
Regular maintenance ensures optimal performance of your Honeywell T5 thermostat. Clean the screen gently, update software, and replace batteries as needed to maintain functionality and efficiency.
Cleaning the Thermostat
To maintain your Honeywell T5 thermostat’s performance, clean it regularly. Turn off power to the system before cleaning. Use a soft, dry cloth to wipe the screen and remove dust or debris. Avoid using harsh chemicals or liquids, as they may damage the device. Gently clean the sensors and surrounding areas to ensure accurate temperature readings. Regular cleaning prevents dust buildup and ensures proper functionality. This simple maintenance step helps maintain energy efficiency and extends the lifespan of your thermostat.
Updating Software
Regular software updates ensure your Honeywell T5 thermostat performs optimally. To update, open the Honeywell Home app and navigate to the thermostat settings. Check for available updates and follow the on-screen instructions. The app will guide you through the process, ensuring a smooth transition. Always keep your thermostat connected to Wi-Fi to receive automatic update notifications. Updating enhances features, fixes issues, and improves performance. Never interrupt the update process, as it may cause system instability. Stay current for the best user experience and functionality.
Replacing Batteries
To replace the batteries in your Honeywell T5 thermostat, first ensure the system power is turned off at the circuit breaker. Remove the front plate by gently pulling it away from the wall. Locate the battery compartment and slide it open. Replace the old AA alkaline batteries with new ones, ensuring correct polarity. Close the compartment and reattach the front plate. Turn the power back on and check for proper functionality. Replace batteries annually or when the thermostat indicates low power for uninterrupted performance.
With proper installation and setup, your Honeywell T5 thermostat will enhance energy efficiency and comfort. Follow the manual for optimal performance and long-term satisfaction.
Final Checks for Proper Functionality
After completing the installation, perform a series of final checks to ensure your Honeywell T5 thermostat is functioning correctly. Test the basic thermostat operations, such as adjusting the temperature and switching between heating and cooling modes. Verify that the thermostat is properly paired with the Honeywell Home app and that all scheduled settings are active. Check that the HVAC system responds appropriately to temperature changes and that the display accurately reflects the current settings. Finally, ensure that geofencing and smart recovery features are enabled for optimal energy efficiency.
Enjoying Energy Efficiency and Comfort
With the Honeywell T5 Smart Thermostat installed, you can now enjoy enhanced energy efficiency and personalized comfort. The smart features, such as geofencing and smart recovery, automatically adjust your home’s temperature based on your location and schedule. This not only reduces energy consumption but also ensures your home is at the perfect temperature when you arrive. Additionally, the Honeywell Home app allows you to monitor and control your HVAC system remotely, providing you with complete control over your comfort and energy usage from anywhere. This seamless integration of technology and convenience helps you save energy while maintaining optimal comfort levels throughout the year.