Marvel Ice Maker: A Comprehensive Guide
Navigating this guide ensures optimal performance, addressing issues like freezer malfunctions, electrical concerns, and component identification—crucial for reliable ice production․
Understanding Your Marvel Ice Maker
Familiarizing yourself with your Marvel ice maker’s features is paramount for efficient operation and longevity․ This appliance, like the Edge Star IB450SS referenced in parts documentation, is designed for consistent ice production, but requires understanding its core functionalities․ Knowing the location of key components – a crucial aspect covered later – will aid in troubleshooting and maintenance․
Effective operation hinges on recognizing potential issues․ Common problems, such as poor temperature holding, frequent defrost cycles, or compressor failures, can impact performance․ Understanding these possibilities, alongside electrical concerns and evaporator coil freezing, allows for proactive maintenance․ Furthermore, appreciating the importance of a well-maintained water filtration system, as integral to the ice-making process, is essential for optimal results and consistent ice quality․

Initial Setup and Operation
Proper setup involves a secure water line connection and initial power-on, initiating the first ice production cycle for optimal performance and enjoyment․
Water Line Connection
Establishing a reliable water supply is paramount for consistent ice production․ Begin by locating the water inlet valve, typically found at the rear of the ice maker․ Ensure your water line is a ¼-inch copper or PEX tubing, adhering to local plumbing codes․ Connect the tubing to the inlet valve, utilizing compression fittings for a watertight seal – avoid using Teflon tape, as it can contaminate the water system․
Before fully tightening, slowly turn on the water supply to flush out any debris․ Inspect for leaks at the connection point and tighten further if necessary․ A properly secured water line prevents water damage and ensures the ice maker’s filtration system functions effectively․ Remember to check for any kinks or obstructions in the water line that could restrict water flow, impacting ice production․ Consistent water pressure is also vital for optimal operation․
Powering On and First Cycle
After establishing the water line connection, plug the Marvel ice maker into a dedicated, grounded electrical outlet․ Avoid using extension cords․ Upon initial power-up, the unit will undergo a self-diagnostic cycle, indicated by illuminated control panel lights․ Allow the unit to run through this cycle uninterrupted – it may take several minutes․
The first ice production cycle will likely discard the initial batch of ice, as it flushes the water system and filter․ This is normal and ensures clean, clear ice moving forward․ Do not consume this first batch of ice․ Monitor the water filtration system during this initial cycle to confirm proper operation․ Observe for any unusual noises or error codes displayed on the control panel, referencing the troubleshooting section if needed․ Patience is key during this startup phase․
Ice Making Process Explained
The system utilizes water filtration, a timed production cycle, and efficient storage, ensuring consistent ice availability—vital for reliable operation and quality ice․

Water Filtration System
Maintaining pristine water quality is paramount for optimal ice production and the longevity of your Marvel ice maker․ The integrated water filtration system actively removes impurities, sediment, chlorine, and other contaminants that can affect ice clarity, taste, and machine performance․
Regular filter replacement, as outlined in the maintenance schedule, is crucial․ A clogged or exhausted filter significantly reduces ice quality and can lead to increased energy consumption and potential component damage․ The system typically employs a multi-stage filtration process, often including a sediment filter and an activated carbon filter․
These filters work synergistically to deliver exceptionally clean water to the ice-making process․ Ignoring filter maintenance can result in cloudy or discolored ice, unpleasant tastes, and a shortened lifespan for your appliance․ Always use genuine Marvel replacement filters to ensure compatibility and optimal filtration efficiency․
Ice Production Cycle Duration
The ice production cycle duration in your Marvel ice maker varies based on several factors, including ambient temperature, incoming water temperature, and the selected ice thickness setting․ A typical cycle, from water fill to ice ejection, generally ranges between 20 to 30 minutes per batch․
However, in warmer environments or with warmer water, this duration may extend․ Initial cycles after installation or filter replacement might also take longer as the system primes and stabilizes․ The ice maker automatically initiates a new cycle once the ice bin reaches a predetermined level, ensuring a continuous supply․
Monitoring cycle times can help identify potential issues․ Significantly prolonged cycles could indicate a problem with the water supply, compressor, or ice ejection mechanism․ Refer to the troubleshooting section for guidance if you observe unusual cycle durations․
Ice Storage Capacity
Your Marvel ice maker’s storage capacity is designed to accommodate a substantial quantity of ice, typically ranging from 25 to 40 pounds, depending on the specific model․ This generous capacity ensures a consistent ice supply for various needs, from everyday beverage cooling to entertaining guests․ The bin is engineered to maintain ice quality by minimizing melting and clumping․
However, it’s important to note that prolonged storage can lead to some sublimation, resulting in a slight decrease in volume over time․ Regularly using the ice prevents this and keeps it fresh․ Avoid overfilling the bin, as this can impede the ice ejection process and potentially cause blockages․
Understanding your model’s specific capacity, detailed in the specifications section, will help optimize ice production and storage․

Troubleshooting Common Issues
Addressing problems like ice production failures, blockages, or reduced output is vital for consistent operation and ensuring a reliable ice supply;
Ice Maker Not Producing Ice
Several factors can contribute to an ice maker failing to produce ice․ First, verify the unit is receiving power and the water supply is connected and turned on․ A frozen water line is a common culprit; inspect for any ice buildup restricting water flow to the ice maker․
Ensure the ice maker is not in “off” or “standby” mode․ Check the freezer temperature – it must be cold enough (typically below 10°F) for proper ice formation․ A malfunctioning water inlet valve can prevent water from entering the ice maker․ Also, a faulty ice level sensor might be signaling a full bin, even when it isn’t․
Finally, a defective ice maker module itself could be the issue․ If these initial checks don’t resolve the problem, further diagnostics or professional service may be required to pinpoint the exact cause and restore ice production․
Ice Blockage and Removal
Ice blockages within the ice maker can significantly reduce production or halt it completely․ A common cause is mineral buildup from hard water, leading to ice fusing together․ To address this, begin by powering off and unplugging the ice maker for safety․
Remove the ice bin and any loose ice․ Carefully inspect the ice maker’s internal components, particularly the evaporator and ice chute, for frozen clumps․ Avoid using sharp objects that could damage the delicate parts․ Warm (not hot) water can be gently poured over the blockage to help thaw it, but avoid getting water on electrical components․
Regular descaling, as outlined in the maintenance section, prevents future blockages․ Once the blockage is cleared, ensure all parts are dry before reassembling and restarting the ice maker․
Low Ice Production
Experiencing reduced ice output from your Marvel ice maker can stem from several factors․ A primary cause is often a clogged water filter, restricting water flow to the ice-making process․ Ensure the filter is recently replaced, following the procedures detailed in the maintenance section․
Insufficient water pressure to the ice maker can also limit production․ Verify your home’s water supply and check the connection to the ice maker for kinks or obstructions․ Ambient temperature plays a role; warmer environments demand more energy for ice creation, potentially slowing output․
Finally, confirm the ice maker isn’t operating in a ‘recovery’ mode after a large ice demand, or experiencing partial blockage․ Consistent low production warrants further troubleshooting․

Cleaning and Maintenance
Regular upkeep, including descaling, filter changes, and scheduled cleaning, guarantees peak performance and extends the lifespan of your Marvel ice maker significantly․
Regular Cleaning Schedule
Maintaining a consistent cleaning schedule is paramount for optimal performance and longevity of your Marvel ice maker․ A daily wipe-down of the exterior surfaces with a damp cloth prevents buildup and maintains a pristine appearance․ Weekly, thoroughly clean the ice bin, removing any residual ice or debris to prevent mold and bacterial growth․
Monthly, a more detailed cleaning is required․ This includes cleaning the water reservoir and any accessible water lines with a mild detergent solution, followed by a thorough rinse․ Pay close attention to areas prone to mineral buildup․ Quarterly, inspect and clean the air filters (if applicable) to ensure proper ventilation․ Remember to always disconnect the power supply before undertaking any cleaning procedures for safety․ Consistent adherence to this schedule will minimize potential issues and ensure consistently fresh, clean ice․
Descaling the Ice Maker
Over time, mineral deposits can accumulate within your Marvel ice maker, reducing efficiency and ice quality․ Descaling removes these deposits, restoring optimal performance․ Begin by disconnecting the power supply․ Prepare a descaling solution according to the manufacturer’s instructions – typically a mixture of water and white vinegar․
Pour the solution into the water reservoir, ensuring it doesn’t exceed the maximum fill line․ Run a full ice-making cycle, allowing the solution to circulate through the system․ Afterwards, discard the descaling solution and run several cycles with fresh water to thoroughly rinse away any remaining residue․ Repeat this process if significant scaling was present․ Regular descaling, ideally every six months, prevents buildup and extends the lifespan of your ice maker․
Filter Replacement Procedures
Maintaining a clean water filter is vital for producing clear, great-tasting ice and preventing internal buildup․ Locate the water filter, typically found within the ice maker’s cabinet or along the water line connection․ Before replacing, shut off the water supply to the ice maker․ Gently twist or pull the old filter, following the directional arrows indicated on the housing․
Ensure the new filter is properly aligned and securely inserted until it clicks into place․ Turn the water supply back on and check for any leaks․ Run several ice-making cycles, discarding the first few batches of ice to flush out any residual carbon particles from the new filter․ Replace the filter every six months, or as indicated by the ice maker’s filter replacement indicator light․

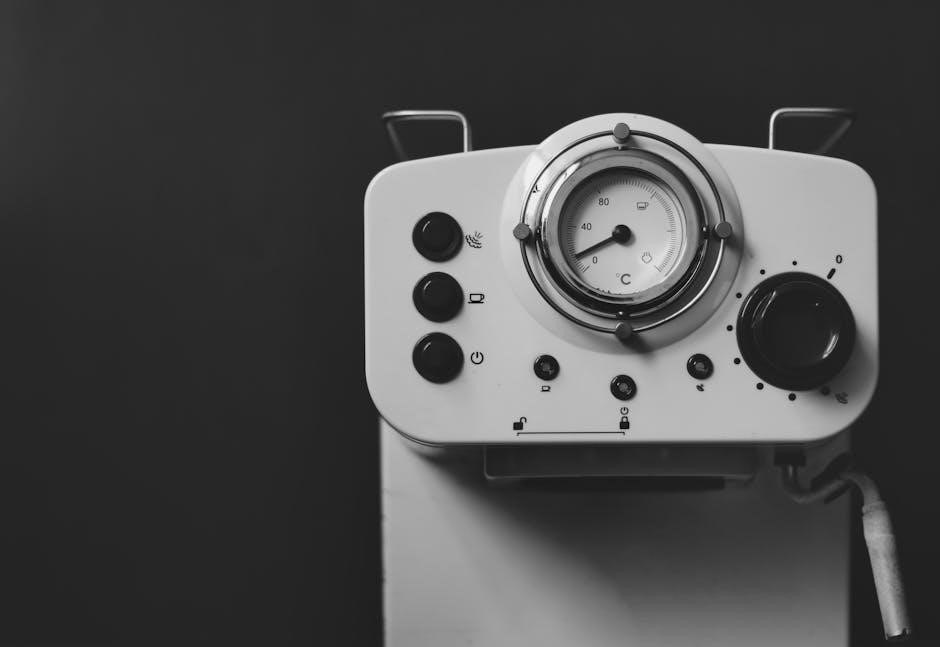
Component Identification & Parts
Detailed parts lists, like those for the Edge Star IB450SS, are essential for repairs, offering descriptions and numbers for efficient replacements․
Locating Key Components (Based on Edge Star IB450SS as a reference)
Referencing the Edge Star IB450SS parts documentation provides a valuable framework for understanding component placement in similar ice maker models․ The compressor, typically located at the machine’s base rear, is a critical element․ The evaporator coil, responsible for freezing water, resides within the ice-making chamber․
The water inlet valve, controlling water flow, is usually near the water line connection․ The water reservoir, holding water for ice production, is often situated above the ice chamber․ The control board, the ‘brain’ of the operation, is generally housed within a protected compartment․
Furthermore, the defrost heater, preventing ice buildup, is near the evaporator․ Identifying these components, using a detailed parts list, streamlines troubleshooting and repair processes, ensuring efficient maintenance and prolonged operational life of your ice maker․
Understanding Part Numbers & Descriptions
Decoding part numbers and descriptions is essential for accurate repairs and replacements․ The Edge Star IB450SS parts list, for example, utilizes a unique alphanumeric system to identify each component․ Descriptions detail the part’s function and compatibility․ A typical entry might include a number like “B234567890,” followed by a description such as “Compressor, 1/2 HP, 220V․”
Understanding these details prevents ordering incorrect parts․ Cross-referencing with the ice maker’s schematic diagram further clarifies component placement and function․ Prices listed alongside part numbers provide cost estimates for replacements․
Always verify compatibility before ordering, as even slight variations can render a part unusable․ Utilizing this information ensures efficient maintenance, minimizing downtime and maximizing the lifespan of your Marvel ice maker․

Advanced Troubleshooting
Addressing complex issues requires careful examination of electrical systems and compressor functionality, prioritizing safety and utilizing diagnostic tools for effective resolution․
Electrical Issues & Safety
Electrical problems within your Marvel ice maker demand immediate attention and a cautious approach․ Never attempt repairs if you lack the necessary electrical expertise; always disconnect the unit from the power source before any inspection․ Common electrical faults include tripped circuit breakers, blown fuses, or damaged power cords․ Verify the outlet is functioning correctly using another appliance․
If issues persist, a qualified technician should inspect the wiring for shorts or loose connections․ Ignoring electrical problems can lead to fire hazards or damage to the compressor; Prioritize safety by avoiding water contact near electrical components․ Remember, attempting self-repair without proper knowledge voids the warranty and poses significant risks․ Always consult the manual for specific electrical specifications and safety guidelines․
Compressor Problems
The compressor is the heart of your Marvel ice maker, and its malfunction significantly impacts ice production․ Unusual noises – loud humming, clicking, or rattling – often indicate compressor issues․ Reduced or complete cessation of ice making is another key symptom․ Overheating can also signal a problem, potentially due to blocked condenser coils or internal failures․
Diagnosing compressor problems requires professional expertise․ Do not attempt to repair the compressor yourself, as it involves handling refrigerant and specialized tools․ A technician will assess the compressor’s electrical components, refrigerant levels, and overall functionality․ Compressor failure often necessitates replacement, which can be a substantial repair cost․ Regular maintenance, including condenser coil cleaning, can help prolong compressor life and prevent premature failure․

Warranty Information & Support
Registering your Marvel ice maker activates warranty coverage; promptly contact customer support for assistance with any operational issues or component failures․
Registering Your Marvel Ice Maker
Prompt registration of your new Marvel ice maker is essential to validate your warranty and ensure access to comprehensive support services․ This process typically involves visiting the official Marvel website and locating the warranty registration section․
You will generally need to provide key information, including the model number, serial number (usually found on a label affixed to the unit), and your personal contact details․ Retain a copy of your registration confirmation for your records․
Registering allows Marvel to efficiently process any warranty claims and provide timely assistance should you encounter any issues․ It also enables you to receive important product updates, maintenance reminders, and exclusive offers․ Failure to register may complicate the warranty claim process, potentially delaying resolution․
Contacting Marvel Customer Support
Should you require assistance beyond the scope of this manual, Marvel offers multiple avenues for customer support․ Their dedicated team is equipped to address a wide range of inquiries, from troubleshooting operational issues to facilitating warranty claims․
You can typically reach Marvel Customer Support via telephone during business hours, details of which are available on their official website․ Alternatively, many queries can be efficiently resolved through their online support portal, offering FAQs, troubleshooting guides, and a contact form for submitting detailed requests․

When contacting support, be prepared to provide your model number, serial number, and a clear description of the issue you are experiencing․ This will expedite the support process and ensure a swift resolution․